Guide to Integrating Cameras into Security Systems from A–Z
In an era where security is increasingly becoming a major concern for individuals and businesses, equipping a surveillance camera system is no longer strange. Cameras not only play the role of recording images but also act as "magic eyes" that support 24/7 monitoring, detect incidents, and help prevent intrusions early. This article will guide you on how to integrate cameras into the security system effectively and comprehensively - from choosing equipment to configuration and actual operation.
The importance of security systems with cameras
In today's era, when security and safety issues are increasingly concerned, surveillance camera systems have become an indispensable part, bringing peace of mind to individuals. individuals, families and businesses. More than just a recording device, security cameras play a key role in protecting property and lives. Here are the main reasons why surveillance camera systems are so important.
1. Effective Crime Prevention and Deterrence
One of the most important roles of security cameras is the ability to prevent theft, vandalism, vandalism or trespassing. The visible presence of cameras is often a strong deterrent, making criminals think twice before carrying out their bad intentions. Studies have shown that areas with surveillance cameras often have significantly lower crime rates than those without.
2. Monitoring and Management Remote Anytime Anywhere
With modern technology, you can directly observe or review images from the camera anytime, anywhere with just a smartphone, tablet or laptop with an internet connection. This is especially useful when you are on a business trip, traveling, or simply want to check if everything is okay at home or office. Remote monitoring capabilities give you peace of mind about your property, loved ones (children, the elderly), or employees.
3. Provide Valuable Legal Evidence
In the unfortunate event of a theft, vandalism, dispute, or accident, images and videos from surveillance cameras are irrefutable evidence. These recordings can be can help authorities investigate and identify the culprit more quickly and effectively. This is an extremely important factor to protect your rights and property before the law.
4. Raise Safety Awareness and Responsibility
For businesses, offices, and factories, camera systems not only monitor security but also raise awareness work procedures and responsibilities of employees. All activities are recorded, thereby helping managers easily control, evaluate performance, as well as promptly detect and handle violations or arising problems.
5. Minimize Damage and Risk Costs
Investing in a security camera system has can help you significantly reduce the damage caused by theft, vandalism, or other incidents. Early detection and timely response can prevent major losses. In the long run, this can also help you save on insurance costs or expenses arising from unwanted risks.
Popular Types of Cameras in Security Systems
Choosing the right type of camera is the first and most important step when building a system effective security. Each type of camera has its own advantages and disadvantages, suitable for different purposes and environments. Below are the most popular types of cameras in security systems today:
Popular Types of Cameras in Security Systems
Choosing the right type of camera is the first and most important step when building an effective security system. Each type of camera has its own advantages and disadvantages, suitable for different purposes and different usage environments. Below are the most popular types of cameras in security systems today:
1. IP Camera (Internet Protocol Camera)
Characteristics: IP Camera is a type of digital camera that transmits images over the internet (LAN or Wi-Fi). Each camera has a private IP address, operating as an independent network device.
Advantages:
- Outstanding image quality: Supports high resolution (HD, Full HD, 2K, 4K), providing sharp, detailed images.
- Smart features: Integrates many advanced technologies such as motion detection, face recognition, behavior analysis, people counting, virtual fences, 2-way audio.
- Access and management Flexible: Easily view live or review via the app on your phone, tablet, or web browser from anywhere with internet access.
- Easy to expand: Simply add new cameras to the system without affecting existing devices.
- Power over Ethernet (PoE): Many IP cameras support PoE, allowing power and data transmission over a single network cable, making installation neat and save.
Disadvantages:
- Requires a stable network: Image quality may be affected if the network connection is weak or unstable.
- Higher cost: Initial investment costs are often higher than analog cameras.
- Requires basic knowledge of the network: Initial configuration may can be a bit more complicated for non-professionals.
Popular types of IP Cameras by shape/function:
- Dome Camera: Hemispherical, usually installed indoors or outdoors with a roof, difficult to destroy.
- Bullet Camera: Cylindrical, usually installed outdoors, good weather resistance, long range.
- PTZ Camera (Pan-Tilt-Zoom): Has the ability to rotate horizontally (Pan), vertically (Tilt) and Zoom in/out (Zoom) remotely, suitable for monitoring large areas.
- Fish-eye Camera: Super wide viewing angle (180 or 360 degrees), suitable for monitoring the entire space.
2. Analog Camera (Traditional CCTV)
Features: Analog cameras transmit image signals in analog form via coaxial cable to a DVR recorder. Modern analog cameras often use HD-CVI, HD-TVI, AHD technology to achieve higher image quality than traditional analog.
Advantages:
- Low cost: Initial investment costs are significantly lower than IP cameras.
- Easy to install and initial configuration: For simple systems, connection is often quite simple. easy (just plug and play).
- Low latency: The signal is transmitted directly, so there is almost no delay.
- Not affected by network errors: The signal does not depend on LAN/Wi-Fi network infrastructure.
Disadvantages:
- Limited image quality: Although it has HD technology, it is often not sharp and details with IP cameras of the same resolution.
- Less intelligent features: The ability to integrate image analysis features is often limited or absent.
- Difficult to expand and wire: Adding cameras or changing locations requires rewiring coaxial cables, which is more complicated.
- Requires a DVR: A DVR is required to convert and store signals.
3. Wireless Camera (Wi-Fi Camera)
Features: This is a branch of IP camera, using connection Wi-Fi to transmit data instead of network cables.
Advantages:
- Flexible installation: No need for complicated network wiring, easy to move the camera to another location.
- Aesthetics: More neat because there are not many connecting wires.
- Suitable for small spaces, less demanding on transmission lines.
Disadvantages:
- Depends on Wi-Fi waves: Quality and Image stability is directly affected by the strength and stability of the Wi-Fi signal.
- Interference risk: May be interfered with by other Wi-Fi devices in the same environment.
- Still requires power: Although wireless signal, but still need to plug the camera directly into the power source (except for rechargeable battery types).
- Security: Need to configure strong Wi-Fi security to avoid unauthorized access.
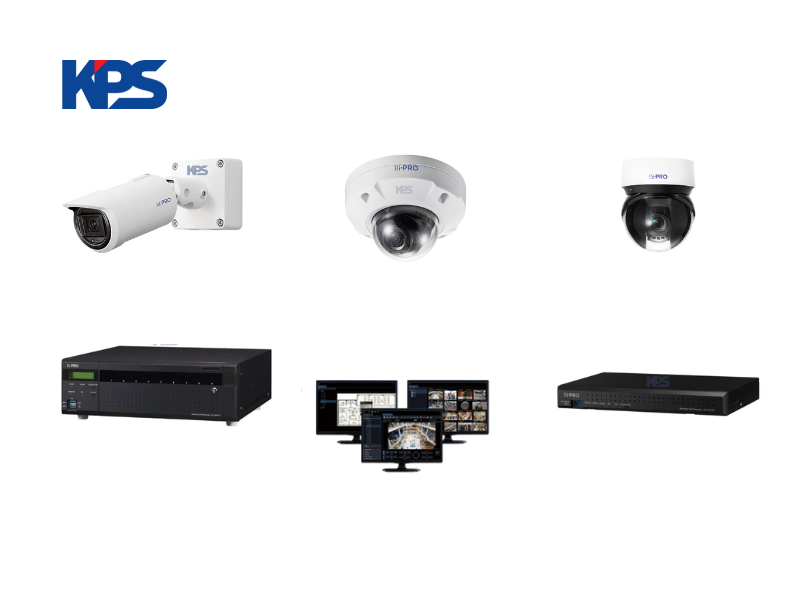
Essential Components of a Camera System
1. Surveillance Camera (CCTV Camera)
This is the "eye" of the system, responsible for collecting images and video from the area to be monitored. As analyzed, there are many different types of cameras to choose from:
- IP Camera (Internet Protocol Camera): Transmits data over the network, providing high-quality images and many smart features. They are Ideal for modern systems that require detailed monitoring.
- Analog Camera (HD-CVI, HD-TVI, AHD): Transmits data via coaxial cable to DVR recorder. Suitable for those who want a cost-effective solution with basic requirements.
- Wireless Camera (Wi-Fi Camera): Connects via Wi-Fi, convenient for flexible installation but needs to ensure stable network signal.
Choosing the type of camera and The number depends on the area to be monitored, the lighting conditions, the environment and your budget.
2. Recorder
This is the "brain" of the system, responsible for receiving image signals from the camera, processing, compressing and storing them on the hard drive. At the same time, it also allows you to view live, review and manage system settings.
- NVR (Network Video Recorder): Used for IP Cameras. NVR connects directly to cameras via the network (wired or Wi-Fi). NVRs often have multiple LAN ports with built-in PoE (Power over Ethernet) to supply power and signal to IP cameras with just one network cable.
- DVR (Digital Video Recorder): Used for Analog Cameras. The DVR receives analog signals from cameras via coaxial cables, then converts them into digital signals for storage and display.
Whether you choose an NVR or DVR will depend on the type of camera you decide to use.
3. Hard Disk Drive (HDD)
The hard drive is where all the recorded video from the camera is stored. The capacity of the hard drive (usually measured in Terabytes - TB) will determine how long you can video storage.
- Specialized hard drive for surveillance cameras: You should choose a hard drive specifically designed for surveillance systems (eg: WD Purple, Seagate Skyhawk). They are optimized for 24/7 continuous operation, more durable and stable than regular computer hard drives.
- Suitable capacity Adaptive: Need to calculate based on the number of cameras, image resolution, recording mode (continuous, motion) and the time you want to store.
4. Cable System
Cables are the transmission path for signals and sometimes power sources for cameras.
- Ethernet cable (Cat5e/Cat6): Used for IP Cameras. In addition to transmitting data, if the camera and switch/NVR support PoE, the Ethernet cable also supplies power, helping to reduce the number of wires.
- Coaxial cable (RG59/RG6): Used for Analog Cameras. This type of wire transmits analog video signals from the camera to the DVR.
- Power cord: Provides power to the camera (if not using PoE) and the recorder.
Neat, technically correct wiring not only ensures aesthetics but also helps the system operate stably and durably.
5. Network Devices
For IP camera systems, network devices are extremely important.
- Router: Provides internet connection and manages the internal network, allowing remote access to cameras.
- Switch: Expands the number of network ports to connect more IP cameras to the NVR or router.
- PoE Switch (Power over Ethernet Switch): Is a special type of switch that The ability to supply power directly over the network cable to IP cameras that support PoE, simplifying wiring.
6. Power Supply
All electronic components need a stable power source to operate.
- Power Supply (Adapter): Each camera or recorder usually comes with its own adapter.
- Centralized Power Supply: Some large systems have can use a centralized power supply to supply power to multiple cameras at the same time, making power management easier.
- UPS (Uninterruptible Power Supply): Also known as a power supply. It is highly recommended to ensure that the camera system is still operating in the event of a sudden power outage, helping to maintain continuous monitoring.
7. Display and Management Device
To view images and system configuration, you will need:
- Monitor/TV: Connect directly to the recorder to view live images and configure the system.
- Mobile device (Smartphone/Tablet): Install the camera/recorder manufacturer's application to view live, review and receive remote notifications.
- Computer (PC/Laptop): Yes can install specialized management software to access and control the system, especially useful for large systems.
Steps to Integrate Cameras into Security Systems
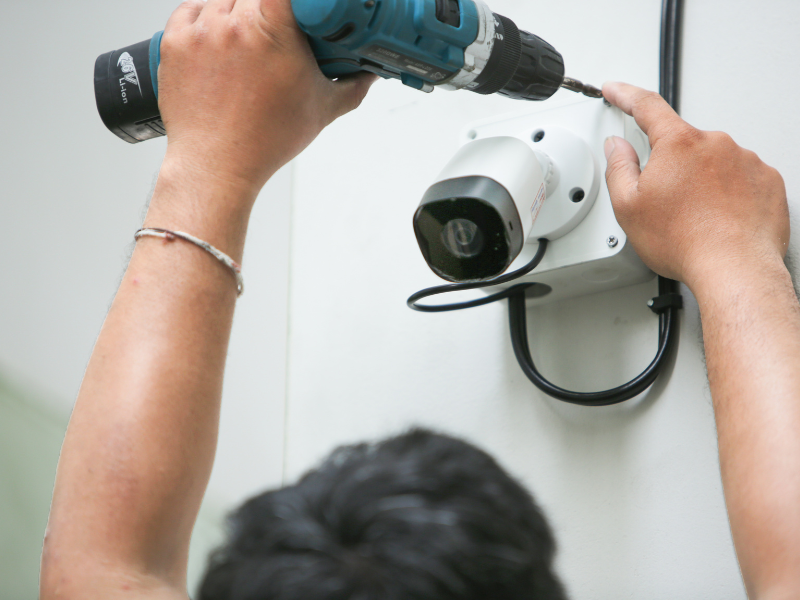
Step 1: Physically Install Cameras and Wiring
This is the fundamental step for the camera to operate stably and durably.
- Mark the location and drill holes: Based on the plan, you should accurately mark the installation location and drill the necessary holes to mount the camera bracket. Make sure this location is high enough to avoid being damaged damaged but still provides the best viewing angle.
- Mount the camera and adjust the preliminary viewing angle: Secure the mount and camera to the wall or ceiling with screws and anchors. Then, adjust the lens angle to cover the desired area.
- Route the signal and source:
- For IP Camera: Run an Ethernet cable (Cat5e or Cat6) from the camera location to the NVR or PoE Switch. If the camera and Switch/NVR support PoE, this one cable will carry both data and power. If not, you will need to run an additional power cable separately.
- For Analog Cameras: Run coaxial cable (RG59 or RG6) from the camera to the DVR. At the same time, you need to run a separate power cord for the camera from a power source or centralized power supply.
- Notes when running the wires: Run the wires neatly, use wire protection tubes if necessary to avoid being cut, wet or affected by the environment. Make sure the connections are secure and protected.
Step 2: Connect the DVR and Start the System
After the camera has been mounted and wired, the next step is to connect the system's control center.
- Install the hard drive into the recorder: Open the cover of the recorder (NVR or DVR), carefully install the hard drive into the slot and Connect the power cable, the included data cable. Tighten the screws to secure the hard drive.
- Connect the recorder to the monitor: Use an HDMI or VGA cable to connect the recorder to your computer monitor or TV. This is screen you will use to configure the system initially.
- Connect the recorder to the Internet: Plug an Ethernet cable from the LAN port on the recorder (NVR or DVR with network capabilities) into an empty LAN port on your router or internet modem. This is important for remote access to the system.
- Connect the power supply and turn on the system: Plug the power adapter into the recorder and the cameras (if the cameras do not support PoE). Turn on the power button on the recorder. The system will start to boot.
Step 3: Initial System Configuration
This is the "setup" step for your camera system.
- Set up basic parameters: When the recorder starts, you will see the initial setup interface on the screen. Follow the instructions to select the language, set the correct date and time, and time zone.
- Scan and add cameras to the recorder:
- For NVR (IP Camera): NVR usually has the feature to automatically scan and search for IP cameras on the same network. If the NVR does not automatically recognize, you need to add them manually by entering the IP address, username and password of each camera.
- For DVR (Analog Camera): Analog cameras will display images immediately on the screen when properly connected via coaxial cable. You don't need to "add" them like IP cameras.
- Network settings for the recorder: In the network settings of the recorder, you should configure a static IP address for the recorder to easily manage and set up remote access later. If you are not familiar with it, you can temporarily leave it in DHCP mode (get dynamic IP) and then reconfigure on the router.
- Set up remote access (important):
- Prefer P2P/Cloud: Most modern recorders support P2P (Peer-to-Peer) or Cloud services. This is the simplest method to view cameras remotely. You just need to download the manufacturer's application to your phone (eg: Hik-Connect, Dahua DMSS, Panasonic Connect), create an account, then scan the QR on the recorder or enter the device ID to connect.
- Port Forwarding (only if needed): If the recorder does not support P2P or you want more advanced configuration, you need to set up Port Forwarding on the router. This step is more complicated, requiring you to open the recorder's service ports on the router and point them to the recorder's IP address. Care should be taken to avoid security risks if not configured properly.
- Recording configuration:
- Recording mode: Select the appropriate recording mode: 24/7 continuous recording, scheduled recording, or recording only when motion is detected. Motion recording will help save hard drive space.
- Set motion detection zones and sensitivity: You can draw specific zones on the camera image where you want the system to detect motion. Adjust the sensitivity to avoid false alarms (e.g., trees shaking).
- Notification settings: Configure the system to send notifications (via email or push notification on the phone application) when an event occurs (motion detection, camera signal loss, hard drive error, etc.).
Step 4: Enhance System Security
Security is vital for a truly secure security system.
- Change the default password: This is an extremely important step. Immediately change the default password of the DVR and all cameras to a strong password (including uppercase, lowercase, numbers and special characters). The default password is the biggest security hole.
- Update Firmware Regularly: Always check and update the latest firmware for the DVR and cameras. These updates often patch security bugs, improve performance, and add new features.
- Disable unnecessary services: Turn off ports or network services on the recorder that you are not using to minimize potential vulnerabilities.
Note When Integrating Cameras
Integrating cameras into a security system does not stop at the installation and configuration steps. To ensure the system operates stably, effectively and safely in the long term, you need to pay special attention to the following points:
1. Ensure a Stable and Safe Power Source
The power source is the lifeblood of the entire system.
- Use the right power supply (adapter): Each camera and recorder requires a type of adapter with a certain voltage and current intensity (Ampere). Using an adapter with incorrect specifications can damage the device.
- Avoid over- Power outlet load: Make sure the total wattage of devices plugged into a single outlet or extension cord does not exceed their safety limits.
- Lightning and electrical interference protection: Install surge protection devices for cameras and recorders, especially outdoor cameras. Avoid running power cords near sources of strong electrical noise (e.g. large motors, welding machines).
- Use a UPS (Uninterruptible Power Supply): This is a very valuable investment. A UPS will keep your camera system running for several hours in the event of a sudden power outage, ensuring continuous monitoring without interruption.
2. Optimize Network Connection (For IP Cameras)
Network quality directly affects the performance of IP cameras.
- Wi-Fi speed and stability (if using a wireless camera): Make sure the camera is within a strong and stable Wi-Fi coverage area. Weak signals can cause lag, signal loss or failure to record. Avoid large obstacles (thick walls, metal) between the camera and the router.
- Use quality network cables: For wired IP cameras, use good quality Cat5e or Cat6 cables, especially for long runs. Poor quality cables can cause signal loss or interference.
- Reasonable network configuration:
- Static IP: It is recommended to assign static IP addresses to NVRs and IP cameras for easy management and to avoid IP conflicts, especially when accessing remotely.
- Bandwidth allocation: If you have multiple high-resolution IP cameras, make sure your router or switch has enough bandwidth to handle the data stream. Yes QoS (Quality of Service) may need to be configured on the router to prioritize bandwidth for the video stream.
3. Ensure System Security
Security is paramount to prevent unauthorized access.
- Change the default password immediately: This is the most common security mistake. Thieves can can easily access your system if you do not change the default passwords of the recorder and camera. Use strong passwords, combining uppercase, lowercase, numbers, and special characters.
- Update Firmware Regularly: Manufacturers regularly release firmware updates to patch security holes and improve functionality. Always keep your recorder's firmware up to date. camera at the latest version.
- Disable unnecessary services: On the management interface of the recorder, disable ports or network services that you do not use (e.g. FTP, Telnet if not needed) to reduce the attack surface.
- Use VPN (virtual private network): If you have network knowledge, setting up a VPN to access the camera system remotely will be much safer than direct Port Forwarding.
- Be careful with strange applications: Only download and use camera management applications from official sources of the manufacturer (App Store, Google Play, or official website).
4. Optimal Installation Location and Environmental Protection
The installation location not only affects the viewing angle but also also affects the durability of the camera.
- Avoid direct light: Do not install the camera directly facing a strong light source (sun, headlights) during the day or at night. This will cause image glare, making the image white and no visibility.
- Weatherproof: For outdoor cameras, choose ones with the appropriate IP Rating and IK Rating. Make sure they are protected from rain, harsh sunlight, snow (if applicable) and extreme temperatures.
- Safe and hard-to-reach locations: Install cameras at a moderate height, where they are unlikely to be damaged damage or obstruction while still ensuring a wide viewing angle.
- Ensure there are no blind spots: After installation, re-check the entire area to ensure there are no "blind spots" that thieves can exploit.
5. Plan Data Storage
Image storage capacity and time are important factor.
- Calculate hard drive capacity: Based on the number of cameras, resolution, frame rate (fps) and recording mode, calculate the hard drive capacity required to store images for the desired period of time (e.g. 7 days, 30 days).
- Smart recording mode: Use motion detection recording mode instead of Record continuously 24/7 to save hard drive space and make events easier to find.
- Back up important data: If there are particularly important videos, back them up to another device (USB, external hard drive) to ensure they are not lost.


: Cost and Operation Optimization")


